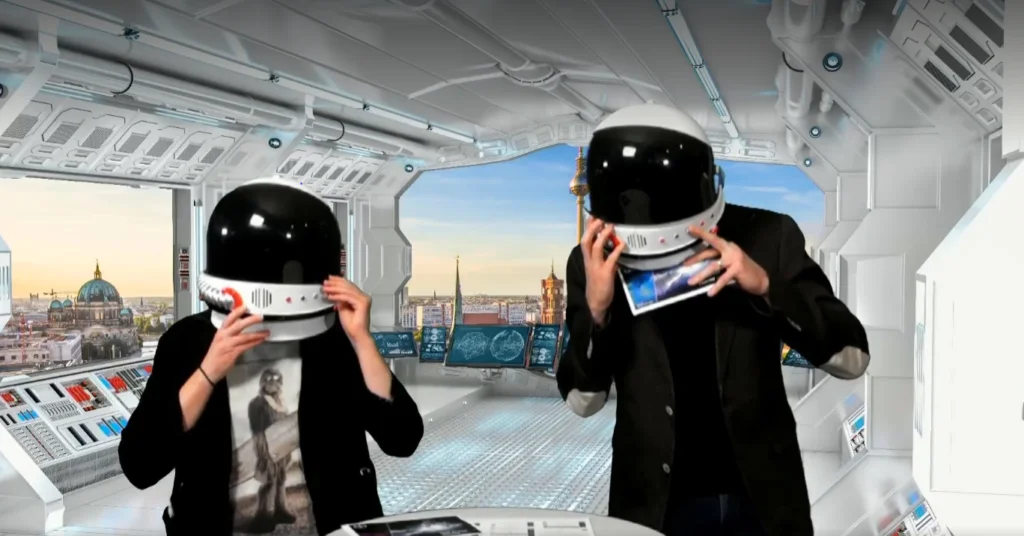

Green screen technology is an indispensable element of film and TV productions. Whether in weather forecasts, in advertising or in action and fantasy movies: without our being able to see it, the green screen has become an invisible part of our everyday lives. Outer space, the jungle or under water – at our events and in our video formats, we take participants on a journey that lets them be inspired and exchange ideas. So that their own creativity doesn’t have to do all the work of getting on board, we like to work with a green screen – to help people break away from everyday routines and to put the focus on creative exchange.
Working in an abstract setting that is set apart from everyday work can help people approach new topics with an open mind. Playful elements usually make it easier to adopt new perspectives.
From blue to green to unlimited possibilities
The first “green screen” was created in 1930 by RKO Radio Pictures and used by Linwood Dunn. Back then, it was called a “traveling matte,” was used for transitions – and was blue.
The ability to replace the green screen with any visual is based on the compositing technique known as “chroma keying.” The software creates a transparent mask for every color pixel. The technical term “keying” comes from post-production and refers to isolating background elements based on a key color. Green, closely followed by blue, is the color least present in our skin pigments. Since clothing often contains a lot of blue, blue has increasingly been replaced by green in recent years. Both, however, are still used in the film industry today.
Preparation is everything
Ideally, the green screen should be as smooth as possible – wrinkles, stains or tears can cause distortions in the image. So it never hurts to have an iron on hand during production in case the clamps don’t pull the screen taut enough. Shadows can also cause distortions, which is why good lighting is just as important. In this case, however, good lighting doesn’t mean the more light, the better: a light source that is too bright can flood the green background so that white light shows up in the footage. This limits what the software can do. Lighting that is too strong creates green fringes around the objects or people in front of the green screen.
It therefore makes sense to adjust the lighting with the camera running and the software open. That way, unwanted effects become visible right away and can be fixed quickly. Changing daylight also affects the final result, so keep an eye on it over the course of a long shooting day. Unsuitable props or clothing that reflect light or contain green pigments are revealed in the process as well – or rather not revealed: they are keyed out and disappear from the image.
Ideally, green screen lighting consists of five lamps: two lamps stand in line with the object or person in front of the green screen, one on the left and one on the right. They are angled toward the green screen to eliminate its shadows. The other two lamps are the key light and the fill light, which are aimed at the subject in front of the green screen. They stand to the left and right, in line with the camera. The key light illuminates the entire scene, while the fill light softens the depth of the resulting shadows. The fifth light is the back light, which hangs above the green screen. Lighting the subject from behind makes it stand out more naturally from the background.
The software is your partner in crime
The proof of the pudding is in the eating – and that applies to green screen software, too. Every green screen setup and every subject is unique and needs its own settings. Today there are dozens of programs, such as Adobe After Effects, Autodesk Smoke, Final Cut Pro and OBS Studio, whose “chroma key” function makes it possible to use green screen technology at home as well. The software identifies the green areas based on a defined color key and overlays them with the selected visuals.
We prefer to work with OBS Studio. It’s free and, beyond the green screen, offers recording and streaming features. With the selectable “Chroma Key” filter, setup and adjustments are a breeze. You can specify the right color tone and precisely set similarity, smoothness, opacity and much more. We use OBS Studio for our green screen because the software includes many other functions, such as overlaying logos, lower thirds and animations. For our work, this all-in-one program is the perfect partner.
Conclusion
In a world where more and more happens ‘online’ and real meetings (have to) be replaced by virtual ones, the green screen is a welcome tool for immersing yourself in other worlds within seconds. It has become an integral part of our virtual events.
Basics checklist for a green screen production:
- Check the green screen for wrinkles, stains or tears
- Stretch the green screen taut (iron it if necessary)
- Open the software to check the lighting
- Position the lights carefully
- Keep an eye on the daylight
- Check props and clothing
- Fine-tune the software settings
- Make test recordings to check
- Experiment and have fun!